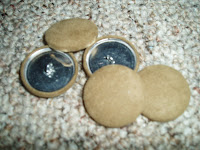
Covering the buttons was pretty fun, and easy. But, make sure you buy the assembly kit too and not just the refills! (the pusher and form are really helpful)
Here is how it was done:
 Supplies left to right: bottom of assembly kit, fabric to cover button cut in a circle (there is a template on the button package showing the size to cut), top of button, bottom of button, and the pusher that snaps the button together.
Here the fabric (right side down) is pushed into the assembly bottom with the top portion of the button.
Next, the bottom of the button is placed on top of that stack (with the loop facing upwards). Make sure the fabric is tucked under the button bottom so it smoothly snaps in place and is completely covered in fabric.
 *This picture is a bit misleading* Place the blue pusher piece on top of the stack and push downward until you hear or feel it snap into place. I used a hammer to help carefully push but DID NOT hammer the button together.
 Here are the buttons all covered and ready to go onto the chair. I'm looking for another excuse to cover buttons for a future project, these were really fun to make!
No comments:
Post a Comment
I love comments and advice! Thanks in advance :)